April 27, 2026 • Maria Russo • 9 min reading time • Prices verified June 24, 2026
Setting Up the Rachio 3 the Right Way: Outdoor Enclosure, Zone Wiring, and App Configuration for a Multi-Zone Yard
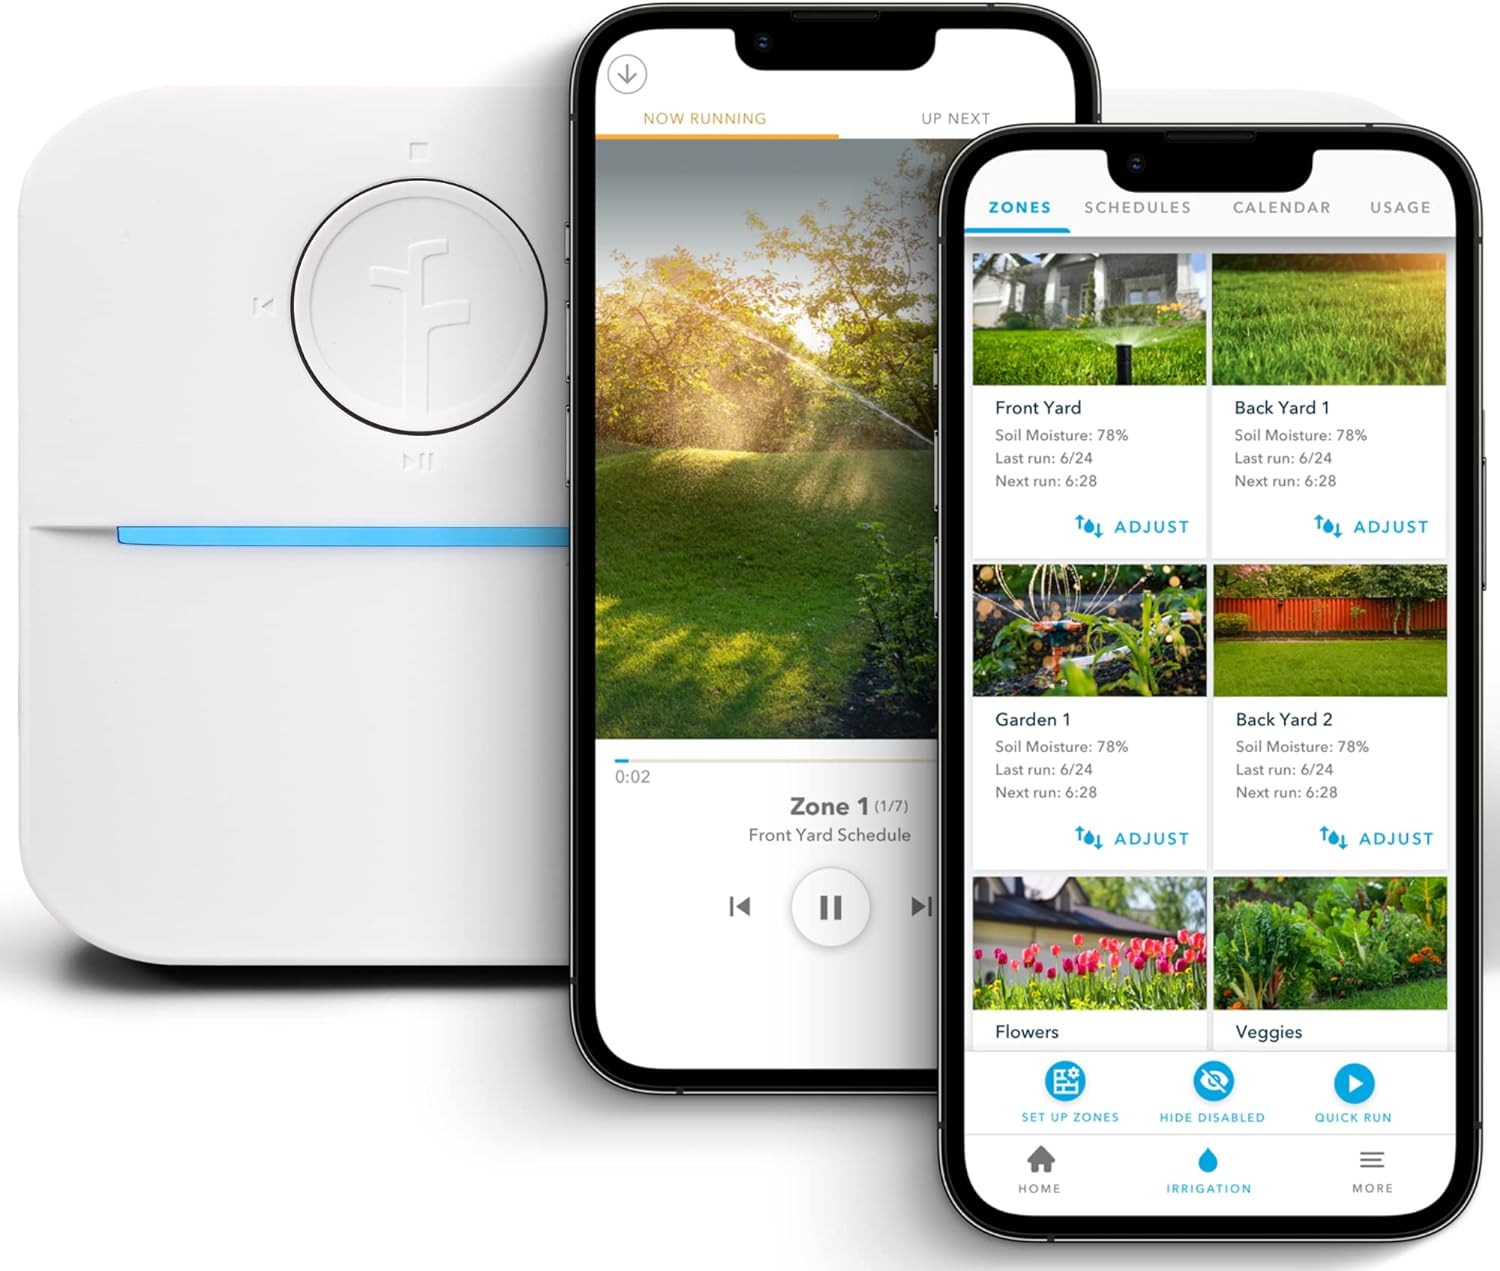
The Rachio 3 is a Wi-Fi-enabled irrigation controller — essentially a smart timer that replaces the clock-style box typically mounted in your garage. Instead of programming watering days manually on a dial, you manage everything through an app on your phone, and the controller automatically skips watering when rain is forecast or soil moisture is already sufficient. If you’re scaling up from a basic hose timer to a real multi-zone system — meaning separate circuits for your lawn, drip beds, shrubs, and slopes — the Rachio 3 is consistently the top recommendation from reviewers at This Old House and Family Handyman for exactly this upgrade path. This guide covers the three decisions where installs most often go sideways: choosing an outdoor-rated enclosure if you’re mounting outside, getting zone wiring right from the start, and configuring the app so the scheduling intelligence actually works. Get these right and the system largely runs itself. Get them wrong and you’ll be debugging ghost-run zones and app errors for weeks.
| EDITOR'S PICK[Rachio 3 Smart Bundle: 8 Zone C…](https://www.amazon.com/dp/B07CZ5K355?tag=greenflower20-20) | Mid-tier[Rachio WiFi Smart Sprinkler Con…](https://www.amazon.com/dp/B07CZ864Y9?tag=greenflower20-20) | Budget pick[Rachio Smart Sprinkler Controll…](https://www.amazon.com/dp/B07CZ864Y9?tag=greenflower20-20) | |
|---|---|---|---|
| Outdoor Encl. | ✓ | ✗ | ✓ |
| Zones | 8 | 16 | — |
| Generation | — | 3rd | — |
| WiFi | — | ✓ | — |
| Smart Features | — | ✓ | — |
| Price | $190.22 | $180.08 | $35.99 |
| See on Amazon → | See on Amazon → | See on Amazon → |
Enclosure First: Indoor vs. Outdoor Mounting and What “IP Rating” Actually Means
The Rachio 3’s circuit board is not weatherproof on its own. The plastic faceplate it ships with is designed for a garage or utility room — a dry, covered interior. If your existing controller was mounted on an exterior wall, in a stucco alcove, or in a ground-level pedestal box, you need to account for moisture ingress before you install the Rachio 3.
IP rating stands for Ingress Protection — a two-digit international standard (IEC 60529) that describes how well a housing blocks solids (first digit) and liquids (second digit). An IP65 rating, for example, means total dust blockage and protection against water jets from any direction. The Rachio 3 unit itself is not IP-rated for outdoor exposure; Rachio’s own installation guide explicitly calls for a protected enclosure for any exterior application.
Your options, from lowest to highest cost:
-
Rachio’s official outdoor enclosure (sold as a separate bundle component): Rachio offers a purpose-built, weatherproof polycarbonate box that snaps around the Rachio 3 and is rated for outdoor mounting. Owners consistently report that the latching mechanism keeps a reliable seal and the clear cover lets you read LED status indicators without opening the box. This is the path of least resistance if you’re mounting on an exterior wall in a climate that sees rain, humidity, or temperature swings below freezing.
-
Third-party NEMA 3R or NEMA 4 enclosure: NEMA (National Electrical Manufacturers Association) 3R boxes are rated for rain and sleet; NEMA 4 adds hose-directed water resistance. If you already have a conduit stub-out from a previous controller and prefer a metal housing, an appropriately sized NEMA 3R enclosure from an electrical supplier will work — you’ll drill a cable pass-through and seal it with a weatherproof grommet. Family Handyman’s irrigation controller installation coverage notes this as the preferred approach when retrofitting into an existing outdoor pedestal setup.
-
Interior mounting with extended wiring runs: If your wire gauge and run lengths allow it, mounting the Rachio 3 indoors (garage, basement utility closet) and running zone wires through conduit to the valve manifold is the cleanest long-term solution. The Landscaping Network’s smart controller comparison guide recommends this approach for multi-zone systems in freeze-prone climates where thermal cycling stresses outdoor electronics over time.
The tradeoff to name explicitly: The Rachio outdoor bundle adds roughly $30–$50 to the system cost but saves 1–2 hours of custom fabrication and eliminates fit uncertainty. If you’re handing installation to a contractor, specify the official bundle so scope creep doesn’t appear as a change order.
Zone Wiring: Terminals, Wire Gauge, and the Common Wire Problem
This is where most DIY installs hit friction. The Rachio 3 uses low-voltage 24VAC (volts, alternating current) to trigger solenoid valves — electromechanical switches buried in your yard that open and close water flow to each zone. Each zone requires two wire connections: a zone wire (sometimes called the “hot” wire) that runs from a numbered terminal on the controller to one side of the valve solenoid, and a common wire (labeled “C” on the terminal block) that completes the circuit back from all valves to the controller.
The most frequent wiring failure: the common wire. In older systems, the common is a single white wire that daisy-chains through every valve manifold. If a previous installer cut it short, spliced it with a non-waterproof connector, or simply forgot to run one, no zones will activate regardless of what the app says. Before you touch the Rachio 3, trace your common wire end-to-end. The Rachio 3 installation guide dedicates a full section to diagnosing missing or broken common wires, and Rachio’s support documentation identifies it as the top cause of “zone won’t activate” support tickets.
Wire gauge matters at scale. Standard residential irrigation wire is 18 AWG (American Wire Gauge — a counterintuitive scale where lower numbers mean thicker wire). For zone runs under 200 feet, 18 AWG is adequate. Beyond 200 feet, or if you’re running more than 8 zones off a shared bundle, resistance accumulates and valve solenoids may not receive enough voltage to open reliably. The Irrigation Association’s landscape irrigation best management practices document specifies that voltage drop across the wire run should not exceed 3VAC at the solenoid under load. For long runs, step up to 16 AWG or run a dedicated common wire rather than daisy-chaining.
By the numbers — Rachio 3 terminal block specs:
| Spec | Value |
|---|---|
| Zone terminals | 8 or 16 (model-dependent) |
| Operating voltage | 24VAC, 50/60 Hz |
| Max load per zone | 0.56A (560mA) |
| Sensor terminals (rain, flow) | 2 dedicated |
| Common terminals | 2 (C1, C2) |
The dual common terminals (C1 and C2) are a Rachio 3 feature worth understanding: they allow you to split high-zone-count systems across two separate common wire runs, reducing resistance and the risk of voltage drop across a single daisy-chain. On 16-zone systems serving different yard quadrants, wiring zones 1–8 to C1 and zones 9–16 to C2 is the configuration Rachio’s installation guide recommends.
Sensor wiring: If you have a rain sensor (a small device typically mounted on a gutter that interrupts watering when it’s wet), the Rachio 3 has dedicated S1 and S2 sensor terminals. Wire it here rather than splicing it into the common wire loop — a common shortcut that creates diagnostic headaches later. The EPA WaterSense program’s irrigation overview notes that rain sensor integration is one of the highest-return-per-dollar additions to any residential system, cutting unnecessary cycles that drive up water bills.
App Configuration: Where the Intelligence Lives (and Where It Gets Wasted)
Hardware done, the Rachio 3’s value proposition shifts entirely into software. The app setup sequence matters more than most buyers expect.
Zone type and soil settings are not optional cosmetics. The Rachio 3’s core algorithm — called Weather Intelligence Plus — uses your zone configuration to calculate how long to run each zone and when to skip. It factors in your precipitation rate (how many inches of water per hour your sprinkler heads apply, which depends on head type and spacing), soil type (clay absorbs water slowly; sandy soil drains fast), slope (steeper slopes need shorter, more frequent cycles to prevent runoff), and sun exposure. Enter generic defaults and the system applies generic schedules. Enter accurate zone data and it functions as a genuinely adaptive system.
The Irrigation Association’s best management practices guide defines distribution uniformity (DU) — a measure of how evenly water is actually applied across a zone — as the single largest variable in irrigation efficiency. The Rachio app doesn’t calculate DU directly, but selecting the correct head type (fixed spray, rotor, MP Rotator, drip) tells the algorithm which precipitation rate ranges to assume. Getting this wrong by even one category can result in 20–30% over- or under-watering relative to plant need, per aggregated owner reports across irrigation enthusiast communities.
Flex Daily vs. Fixed schedules — the decision that trips up new users:
-
Flex Daily is Rachio’s most sophisticated schedule type. It models your soil as a virtual bucket, fills it based on rain data and watering cycles, and drains it based on evapotranspiration (ET — the rate at which plants and soil lose moisture to the atmosphere, calculated from local weather). It only waters when the bucket runs low. This is the schedule that earns WaterSense certification and justifies the $279 price point. The EPA WaterSense program has verified Rachio 3’s ET-based scheduling methodology against its efficiency criteria.
-
Fixed schedules run on days and durations you specify, with weather skip as a layer on top. Easier to understand; less efficient over a season. This Old House’s smart controller coverage recommends Flex Daily for owners willing to invest 30 minutes in accurate zone setup, and Fixed with weather skip for owners who want simple predictability with some savings.
The subscription question: As of mid-2026, Rachio 3’s core functionality — Flex Daily, Weather Intelligence Plus, app control, Alexa/Google Home/Apple HomeKit integration — remains available without a paid subscription. Rachio does offer a premium tier with enhanced diagnostics and multi-controller management, but it’s not required for the features most buyers purchase the unit to access. This contrasts with Hunter Hydrawise, where some advanced features are gated behind the Enthusiast plan. Verify current tier structure at Rachio’s site before purchase, as this is an area where vendor pricing has evolved.
The Decision Frame: If X, Then Y
If you’re mounting outdoors in any climate with measurable rainfall or below-freezing winters, buy the Rachio 3 + outdoor enclosure bundle rather than sourcing the enclosure separately. The fit and seal reliability is worth the small premium over the fabrication risk.
If you have more than 8 zones, start with the 16-zone model even if you’re only activating 10 zones today. The Irrigation Association recommends designing to 125% of current zone count for any system you expect to expand — adding a zone to a maxed-out controller means replacing it entirely.
If your existing wire run exceeds 200 feet for any zone, measure resistance before assuming 18 AWG works. A $15 multimeter and 20 minutes of testing is cheaper than chasing intermittent valve failures after installation.
If you want the scheduling intelligence to actually deliver water savings, spend the 30 minutes on Flex Daily zone configuration. The Rachio 3 is not a set-and-forget device out of the box — it becomes one after you’ve given it accurate inputs. Owners who complete the zone setup consistently report 20–30% reductions in seasonal water use in aggregated review data; owners who leave zone type at default frequently report the system feels “no different from my old timer.” The hardware is the same in both cases. The configuration is the variable.